
A solid oak skirting board can look acceptable in the raw and still need work before it enters your finishing process. A stain may reveal scratches that were difficult to see on bare timber. A smooth flat face may sit beside a moulded recess with a different preparation level. For a manufacturer, those differences affect the next operation.
The useful question is whether the supplied surface suits the process you intend to run. Assess the profile geometry, machining marks and preparation together, then confirm the result through a representative production trial. ‘Smooth’ is too broad a description to settle that requirement.
Define where the supplier’s preparation ends
Start with what your business will do to the board. A distributor supplying unfinished skirting needs a saleable surface that matches its product description. A manufacturer applying a pigmented coating needs a substrate compatible with its preparation and application sequence. Neither requirement can be established from the profile name alone.
Describe whether the proposed supply is machined, sanded or otherwise prepared, and identify any further work your team expects to carry out. If sanding is included, clarify which faces and moulded details it covers. Avoid assuming that the preparation of a broad face also describes the bottom of a groove.
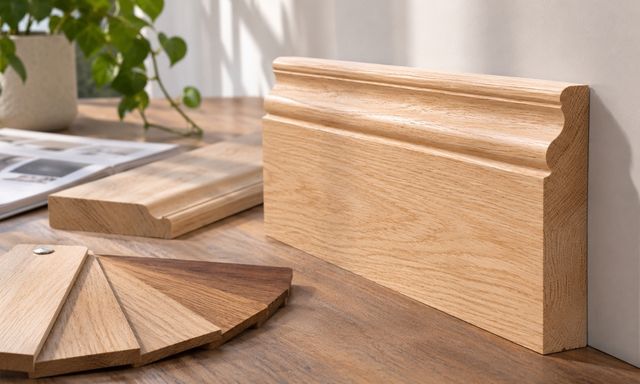
This discussion should sit alongside the section specification. When reviewing solid wood skirting profiles, consider how the shape affects access for subsequent preparation. A simple upper edge and a deeply moulded detail place different demands on the next operation.
Read the surface without losing sight of the section
Machining establishes the profile as well as the surface left by the cut. Tooling condition, cutter alignment and the way the timber travels through the machine influence that result. Assess the delivered board rather than inferring its quality from a machine brand or a general manufacturing claim.
Flat faces and moulded details
Use light across the surface to reveal repeated cutter marks, ridges and local depressions. Examine the transition between the flat face and the moulded edge, where an irregularity may be less obvious when viewed straight on. Check more than one position along a representative length.
Look closely at torn fibres around changes in grain direction. Oak’s natural figure and texture are part of the material, but a rough patch left by cutting needs a separate judgement against the agreed supply condition. Record its position and appearance so feedback describes something the supplier can assess.
Edges that must retain their shape
An edge may feel smoother after additional sanding while moving further from the intended section. Excessive local preparation can soften a detail or round a junction that should remain defined. Compare the prepared piece with the agreed profile, particularly where it meets another component.
Where dimensions or fit are critical, agree how they will be checked. A visual surface assessment cannot establish dimensional conformity, and one tolerance should not be assumed to cover every feature of a bespoke moulding.
Match sanding to the finishing system
The finest abrasive is not automatically the best final preparation. Coating systems differ in the surface they require, and the intended application method can also matter. Use the coating manufacturer’s current guidance to establish an appropriate sequence for the actual timber and product.
Sanding scratches deserve attention before a pigmented finish goes into production. A surface that feels even to the hand may still carry marks that become more conspicuous after colour is applied. Removing them at that point can involve repeating preparation and finishing work.
Agree how dust and contamination will be managed between preparation and coating. Check the timber’s moisture condition against the requirements of the finishing system too. A clean-looking surface gives no reliable indication of moisture content, and a universal moisture figure would not describe every process.
Use a trial that reflects the work ahead
Run representative material through the preparation and coating sequence your team intends to use. Include the moulded detail as well as the broad face. A trial on a separately sanded flat offcut will not show how the complete section behaves in your operation.
Record the supplied condition, additional preparation and coating used. Assess the result under lighting relevant to the finished product, after the coating has reached the assessment stage specified by its manufacturer. Retain a comparison piece so the team can distinguish a change in the timber from a change in preparation.
If the trial exposes a problem, identify the stage at which it appears. A mark already visible on the uncoated board raises a different question from an uneven appearance that develops during application. That distinction gives the supplier and your finishing team a useful basis for investigating the result.
Turn the agreed result into a usable specification
Keep the accepted section and surface condition linked to the product reference. Describe the preparation included at supply and the work your business will undertake afterwards. An approved example is most useful when the accompanying record explains what it demonstrates.
For an enquiry with L&J TOPWOOD, view product details for bespoke solid wood skirting and explain the process the component will enter. The surface requirement can then be discussed alongside the section, rather than left for the finishing team to resolve after delivery.